
Note: If you want the links to open in a new tab and not take you away from the page you are on, then hold down "CTRL" while clicking on the links
WSI Introduction:
You’re on the scene with WSI. In this campy but complex Unit of Study, juvenile detectives of the Cold-Water Case Squad investigate and identify the cause of a calamity in the community. Student sleuths work together, finding the clues that protect lives and livelihood; solving the question, “What’s in the WATER?” before time runs out!
Unit Guiding Questions:
How is water polluted and how can we keep human activity from compromising the viability of our watershed, groundwater and water cycle systems?
Four Fields of Study | Objectives:
WATER CYCLE – Detect the role of water in human/animal wellness and connect environmental health challenges to threats associated with a changing climate.
GROUNDWATER – Analyze data to solve a mystery and identify potential groundwater pollutants.
WATERSHED – Identify surface forms of pollution and consider ways to reduce urban runoff and the flow of contaminants in water throughout a watershed.
SUSTAINABILITY – Conclude that past solutions, developed with the best intentions, may create contemporary problems. Act as environmental stewards, conserving and keeping water clean through both behaviors and available technologies, supporting resilient solutions that benefit the (biodiverse) community.
Introduction & Layout of Casefile - APW Staff Visit:
Note: If you want the links to open in a new tab and not take you away from the page you are on, then hold down "CTRL" while clicking on the links
Teachers will receive the case files for their classes during the Professional Development Workshop that they attend.
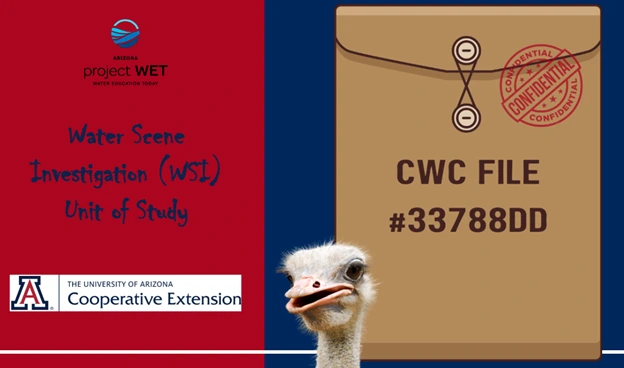
A pdf copy of the file can be found here just in case you need it or want to throw it up on a big screen in front of the class while your students review the hard copies… WSI-Cold Water Case File #33788DD.
You can also find copies of student pages you may want to print here – Student Notes, Arguments and Map WS
APW staff will visit your school and introduce the case file to set the scene:
Your students are detectives of the Cold-Water Case Squad, and they must investigate and identify the cause of a calamity in the community. They should work together to find the clues that protect lives and livelihood: solving the question, “What’s in the Water?” before time runs out!
Arizona Project WET staff will have stations set up so that all interested classes can join us at one time. APW staff will then introduce the casefile and watershed and groundwater concepts along with touching on climate change. There will be hands-on resources and models to engage the students and to get them enthused about the topics. The goal here is to help them better understand the groundwater system and how watersheds work as they delve into what the culprit might be. We will not provide them with the specific answers but will try to help them get a better picture of how the systems work in real life. The models we bring are then available for you (teachers) to borrow at any time to use with your students.
Groundwater Activity:
Identify the inputs and outputs of a groundwater system and understand the relationship between surface water and ground
Recognize the impacts of human activities on ground
Watershed Activity:
Identify what a watershed is and what it is a part of.
Demonstrate how water moves through their watershed and model the human impact of changes to that natural system (pollution and heat).
Reflect on how urban contaminants can disperse and share solutions for promoting sustainable habits within watershed management.
Setup For In-class Lessons:
We encourage you to give the case files out before starting any of the lessons and to let students go through them, maybe in groups or pairs (using online resources), and think about what they have discovered. They can use the ‘Miscellaneous Notes’ page to jot down ideas and to take notes during the class discussion. You can also have your students start to fill out the worksheet in the back of the case file that correlates to the ‘lettered’ map (also found at the back of the booklet). This worksheet will be a good place to keep referencing and returning to as they discover more clues and do more research into the culprit.
This would be a good time to have a class discussion and let the students create a driving questions board… with the goal being to try to group the possible problems into three categories:
- Groundwater pollution
- Watershed/surface runoff pollution
- Waterborne Diseases and environmental climate issues
Some leading questions that might help with this are:
- What are some of the things you think might be making the birds sick?
- Where on the property are those things coming from?
- How would those things move/travel across the property?
- How could those things spread to different ostriches?
- Are there other things that could be the problem that we don’t have info about?
3 Groups & Create Initial Argument:
Once you feel like the class understands the basic categories, assign students to each group and have them work together to create an initial argument as to why the topic they have been assigned might be the culprit. You can let the students know that additional leads/evidence will be provided as they go through the unit.
- There is a page towards the end of the case file for their initial argument and where they can keep adding evidence for this argument.
Do the Lessons:
We then suggest doing the 3 lessons below with your students. There is a ‘notes/feedback page’ for each lesson for the students to write down ideas or evidence that they think might help the case file as they learn more information in each lesson. The order doesn’t matter so much, but as you complete each lesson you can also then have students review and think about the additional casefile leads that go with each lesson. We anticipate that students are then continuously adding to their Map Worksheet page and their initial argument page as they continue to make new discoveries.
GROUNDWATER & SUSTAINABILITY
LESSON 1: A PLUME PROBLEM
Investigative Question:
How does water move underground?
If groundwater is contaminated, will pollutants move to other nearby locations?
Activate: In small groups students read through a scenario and plot data on a map to discover contamination levels. Soon they believe they know the source of the arsenic, as they race to see who can solve the problem. Then new evidence is provided making it clear that the data they have may not lead to only one answer. This helps students understand how water moves underground and how contaminants can spread.
Check: Students discuss in small groups how you shouldn’t assume your first solution to a problem is always correct and that sometimes double checking is worth it. Students also discuss how past solutions sometimes become present problems.
Cross Cutting Concepts Demonstrated:
Cause and effect
Science and Engineering Practices Integrated:
Ask questions and define Problems
Analyze and interpret data
Engage in argument from evidence
WSI Unit Slides Pre Lesson 1 and Lesson 1:
- PowerPoint Slides Pre-lesson 1 & Lesson 1
- Google Slides Pre-lesson 1 & Lesson 1
- PDF Slides Pre-lesson 1 and Lesson 1
New Leads to share from Casefile that correlate to this lesson:
Additional Materials:
Link to PDF of entire A Plume Problem Lesson from Foundations Book (need password to download it – ArizonaPW
Other Resources:
- Arizona Project WET Groundwater Video Series
- You can also use this online simulation - https://has.concord.org/groundwater-movement.html
- How water moves through earth materials video and demonstrating capillary action https://youtu.be/_KEjB-u4dQo
- PBS Groundwater Resources
- https://www.usgs.gov/special-topics/water-science-school/science/groundwater-information-topic
- Audubon Southwest - Understanding Arizona's Groundwater
- Arizona Water BluePrint - Arizona Groundwater Dashboard
- Groundwater in the Colorado River Basin
WATER CYCLE, WATERSHED & SUSTAINABILITY
LESSON 2: WATERSHEDS WORK
Investigative Question:
How does human impact on the land affect water and heat within a watershed?
- How can we reduce urban runoff and the flow of contaminants in water throughout a watershed?
Activate: Students use maps and modeling to characterize first what a watershed is and to identify the key parts and functions of watersheds. Students then explore the topics of permeable and impermeable surfaces, the urban heat island effect and pollutants from runoff to better understand how humans can impact the flow of water and the temperature within an urban watershed. Students investigate their school grounds during a scavenger hunt identifying different surfaces, possible pollutants and recording temperature of surfaces with a heat gun. Students can also create and play with mazes to represent the storm drain system carrying away runoff. Or you may borrow our Enviroscape models from Arizona Project WET so your students can manipulate and experiment with the watershed models. Through this simulation students discuss what happens to the quality of water in an urban environment.
Check: Students make conclusive claims about impermeable and permeable surfaces and the heat and pollutants they create based on the evidence they collected during the scavenger hunt and activities. Then they discuss possible solutions to these human-caused problems.
Cross Cutting Concepts Demonstrated:
Cause and effect
Systems and System Models
Science and Engineering Practices Integrated:
Ask questions and define Problems
Analyze and interpret data
Engage in argument from evidence
Develop and use models
WSI Unit Slides Lesson 2:
New Leads to share from Casefile that correlate to this lesson:
Materials Needed:
Spray bottles
2 pieces of 8-1/2 by 11 white paper per student (scrap paper can be used if blank on one side) or large pieces of butcher paper/poster paper (2 per table group)
Water soluble markers (green, blue, brown, red, purple)
Scotch Tape
Materials Needed for Worksheet Activity:
- Runoff & Heat Investigation Worksheet for each student (handout)
- Clipboards (one for each group if possible)
- Temperature gun (provided by APW if attended workshop)
Link to PDF of entire A-maze-ing Water Lesson from Project WET 2.0 Book (need password to download it – ArizonaPW
Here is also the webpage where I got the heat maps and tree cover maps – here.
Other Resources:
- Health and Function of Arizona Watersheds
- PBS Watershed Resources
- https://www.usgs.gov/water-science-school/surface-water
- AZ STORM - Stormwater 101
- Salt River Project Tour - Arizona Project WET creation
- Audubon Southwest and The Nature Conservancy in Arizona StoryMAP: Exploring the Verde River Watershed
Lesson 2:
Warm Up:
Feel free to use the slides provided above. Ask students: What is a watershed? Split the word in two and ask, what is water? (we are just looking for a simple definition here). What is a shed? They will likely know that sheds store something. What does a watershed store? Water. Then, think about shed as a verb. What does it mean to shed? They will likely be able to relate the word to a pet. A pet sheds hair. What do you think watersheds shed? Water. We relate this to water running off the land. Do you think a watershed looks like a toolshed? No.
A watershed is a land area that drains to the low points. What marks the edge or boundary of a watershed? The high points or mountains. What are the low points? The rivers or valleys that may become rivers when it rains. When managing a watershed, we are managing both the land and water … everything within the boundaries.
Investigation Activity:
We are going to make a model of a land area.
Put a piece of 8 ½ by 11 white paper down on the table in front of you (blank side up if using scrap paper).
Crumple the second piece of 8 ½ by 11 white paper (blank side facing out if using scrap paper).
Un-crumple the paper until you can find all four corners, it should not be perfectly flat.
Tape all four corners of the crumpled paper onto the flat piece of paper in front of you. Leave the crumpled paper as high as you want. It should now look like mountains or a raised relief map.
Using water soluble markers, draw symbols that represent different features on your relief map using the following key:
Green marker to draw a line along all the ridges (the up folded areas).
Blue marker to draw a line along all the valleys (the down folded areas).
Red marker to indicate any abandoned mines with a * symbol.
Purple marker to indicate cities with a # symbol.
Brown marker to indicate a farm with a colored-in area.
You have made a model of the land surface or a raised relief model.
Predict how water is going to flow on your model when we spray them with water. What direction will water flow? Why?
Are there areas on your model that have no outlet and will store water?
Have students take their models outside where they will spray their model with a spray bottle, in other words they are going to make it rain!
While Outside: Have students form a circle and place their models in front of them toward the middle of the circle. Share spray bottles and give all students time to make it rain on their models. After students have sprayed their models, ask students to recall the definition of a watershed. What is the edge or boundary of a watershed? The high points. What color are the high points on the model or map that you made? Green.
What are the parts of your watershed? Have them point out their answers on their maps. The water, the city, the farm, high points, low points, etc. What is the white area? If they don’t know, ask: What is the definition of a watershed? Give them time to think about this. The white is the land area. What could be on the land area other than cities, old mines and farms? Forests, deserts etc.
Do a circular gallery walk so that students can view other students’ models. How are they the same? How are they different?
Discuss each of the following questions with your students. Did any of your cities flood? If there was pollution on your city streets, could it get into your farm field? Could excess pesticide or fertilizers from your farms go into your cities? Could old mines affect water coming into cities or farms?
What is a watershed again? Do you think you live in a watershed? Yes, we all live in a watershed.
What is a watershed a part of? Give them time to think about this, talking with the person next to them. A landscape or bigger land area, our community, our water supply. It can also be a part of another watershed.
Lesson 2 Worksheet Activity:
- Use the slides provided above to introduce or review with your students some urban watershed topics.
- Have students define what a permeable landscape is and how water behaves on a permeable surface - water soaks or infiltrates into the soil. Once in the soil, it can go into plants or keep traveling further to reach groundwater. Some water also evaporates. Have students write down examples of permeable landscapes in their notebooks.
- Have students define what an impermeable landscape is and how water behaves on an impermeable surface - water stays on the surface or runs off. Water can also evaporate. Have students write down examples of impermeable landscapes.
- Have students define what the urban heat island effect is and how water behaves in this landscape – there may be less rain overall because of the heat dome or if there is rain there is more runoff that can’t soak in. Water can also evaporate faster. Have students write down examples of things that might increase heat (pavement, buildings, AC units, cars) or suggest things that might cool down the urban environment (trees).
Proceed with Storm Water Scenario and Warmup in Lesson attached, but then come back and do this Activity 1 before moving onto Activity 2 (optional) below.
Activity 1 – Runoff & Heat Investigation:
- Break students into small groups and give each student their own worksheet. If you don’t have many clipboards, have only one student from each group take their paper outside, and then have the rest of the group record the data when you get back into the classroom. Students in each group can take turns being the recorder.
- Explain to the class that you will be going around the school campus looking at different surfaces (permeable and impermeable). It would be best if they try to find at least one surface of each and one that is in the sun and the shade so they can make some contrasting observations.
- Students also should be recording the temperature of the surface with the temperature gun and listing any possible pollutants they might find.
- Once back in the classroom, students can share the info they collected so that everyone can record the data on their own sheet. Then students turn the page over and answer the other questions. You can also facilitate this as a class discussion.
- Which surface was hottest, why? Was it permeable or impermeable? Does this surface add more heat and pollutants to our cities?
- Which surface was coolest, why? Was it permeable or impermeable? Does this surface help cool down our cities and maybe reduce pollutants?
- What are things you and your family can do to help keep our cities cooler and to protect our water
Proceed with Activity 2 (optional) from lesson if you want to dive deeper into this topic and then do wrap up activity.
You can also borrow our Enviroscape Watershed models from APW, so that your students can have hands-on fun.
WATERSHED, WATER CYCLE & CLIMATE
LESSON 3: CSI - WATER & DISEASES
Investigative Question:
- What is the role of water in transmitting diseases and in human/animal wellness?
- How do the characteristics of environments that promote the transmission of diseases change with a changing climate?
Activate: Students learn about how a changing climate may affect waterborne and vector diseases and the role of epidemiology in disease control by searching for others who have been “infected” with the same waterborne diseases that they have.
Check: After students with the same hypothetical disease get into groups, each group will present a summary of how climate change may affect their disease.
Cross Cutting Concepts Demonstrated:
Cause and effect
Science and Engineering Practices Integrated:
Ask questions and define Problems
Analyze and interpret data
Engage in argument from evidence
WSI Unit Slides Lesson 3 & Sustainability:
- PowerPoint Slides Lesson 3 & Sustainability Slides
- Google Slides Lesson 3 & Sustainability Slides
- PDF Slides Lesson 3 & Sustainability Slides
New Leads to share from Casefile that correlate to this lesson:
Materials Needed:
Three glasses of water: (one plain water, one water with salt and one murky with dirt or coffee/tea added)
CSI Lesson - Copy Pages (Be sure there are enough Disease Symptom Cards for each student. Make four copies of each for a class of 24, five copies for a class of 30, etc.)
Link to PDF of entire CSI: Water & Diseases Lesson from Foundations Book (need password to download it – ArizonaPW, but will provide you with lots of background information and all the associated activities.
Other Resources:
Great video of global warming & climate change: https://www.youtube.com/watch?v=G9t__9Tmwv4
Warm Up:
Feel free to use the slides provided above. Make sure students understand the basic principles of the greenhouse effect and why climate change is happening. Proceed with warmup from Lesson....
Show students three glasses of water: one murky due to sediment, one clear with salt added and mixed in and the third with clean water.
Ask them, “Which glass of water would you prefer to drink?”
Ask students what the difference is in the two clear water glasses. Could one of them have something in it you can’t see? What? (Bacteria, viruses, protozoa, etc.)
Ask students if they know of a condition that kills millions of people each year yet is something that each of them has probably had multiple times without being seriously ill.
Explain that diarrhea—viewed as little more than a nuisance in the United States and other developed countries—causes the deaths of some 1.3 million children each year, making it one of the leading causes of deaths among children worldwide.
Ask students what causes diarrhea. (Microorganisms such as bacteria, viruses and protozoa.) What do students think is the source of these organisms?
Reveal that you added salt to one of the glasses. Make the point that disease-causing organisms can be found in clear, “clean-looking” water and that the only way to detect these organisms is to test the water.
Activity:
Proceed with Part 1 and Part 2 from the lesson.
You do not need to but are welcome to do the Climate Resilience Activity part of this lesson. But the Wrap Up section can also include discussing how climate change and drought may have played a role in the Ostrich case.
SOLVE & CLOSE THE CASE FILE
Solve the Case File:
At the back of the case file, you will find more evidence and test results that will help close the case. Have students review these documents and work in their groups again to do some more research on their topic (symptoms of ground water pollutants, symptoms of fertilizer/pesticide poisoning, symptoms of bird flu/West Nile virus, etc.) and have them finally create their FINAL argument as to the culprit. If after hearing all the arguments, individual students don’t believe the actual culprit is the group they are in, then they can fill out the ‘individual final argument’ page, explaining which one they do believe is the problem.
The lab results and additional evidence should provide enough info to lead them to figuring out where the culprit came from.
WSI Case File – Lab Results & Final Evidence
Close the Case:
You will also have a final letter from the Senior Detective from the Cold-Water Case Squad sharing their conclusion and you can decide whether to wait a day or several days before providing the students with the actual answer.
Also, this is where you can share the Student Sustainability Worksheets and have a final discussion on now that the students better understand how the things people do to the land, water and within a watershed can have negative effects on the environment, how can we make daily choices and participate in good actions to help protect and conserve our water.
Teacher Answers for Student Sustainability Worksheets
Answer Sheet for Map Worksheet in Case File